This article tells you how to connect an Azure tenant to Stratusphere as a data source.
There are two ways to connect your tenant:
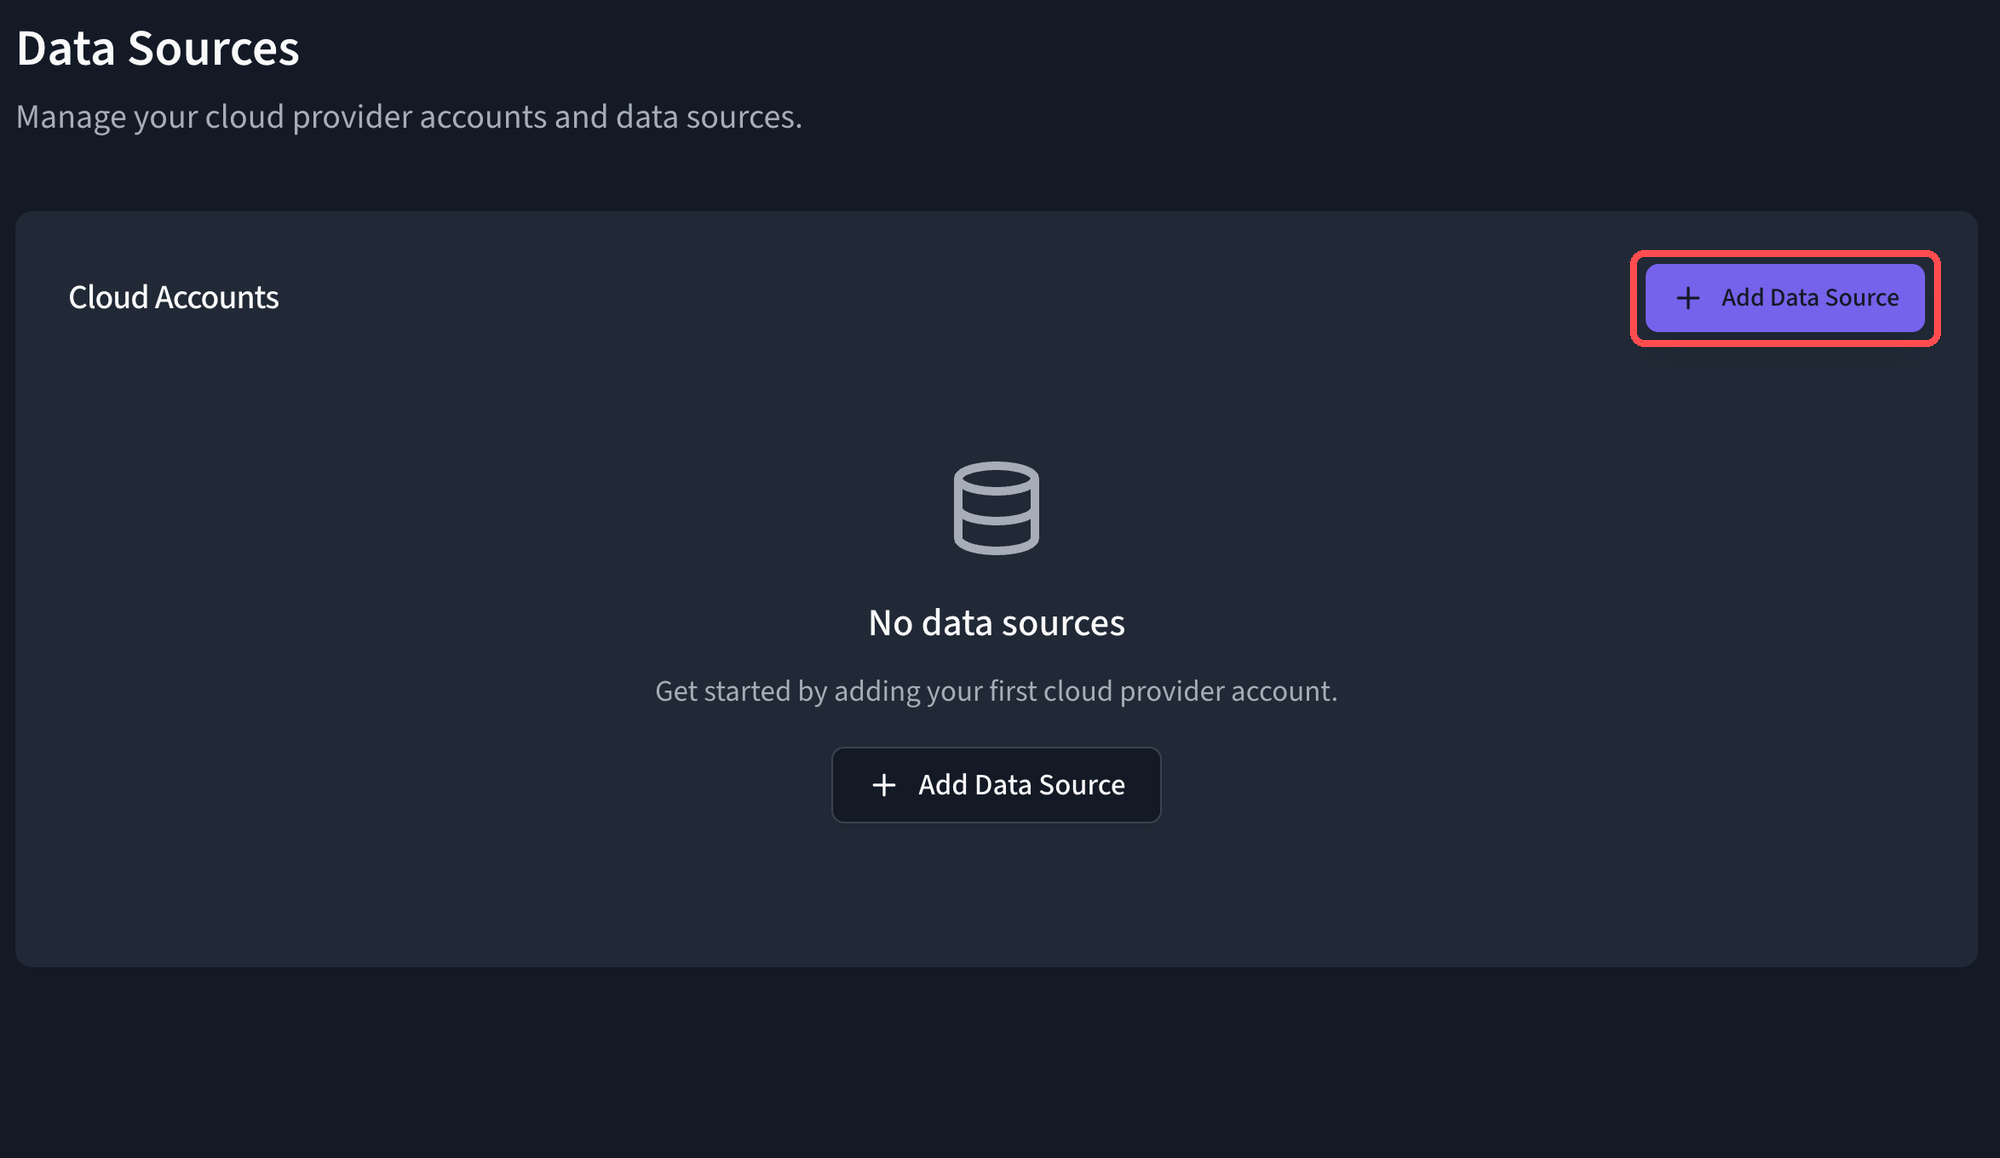
- Quickstart setup (recommended): choose this if you can run a script in Azure Cloud Shell. One command does every step in Azure, then gives you a client ID to enter in Stratusphere to complete the setup.
- Manual setup (alternative): choose this if your change-control process requires you to do each step yourself. You get your API token and certificate link from Stratusphere, do each step in Azure, and then enter the client ID in Stratusphere to complete the setup.
Choose one method. Using both could result in your Azure costs being counted twice in Stratusphere.
What the setup creates
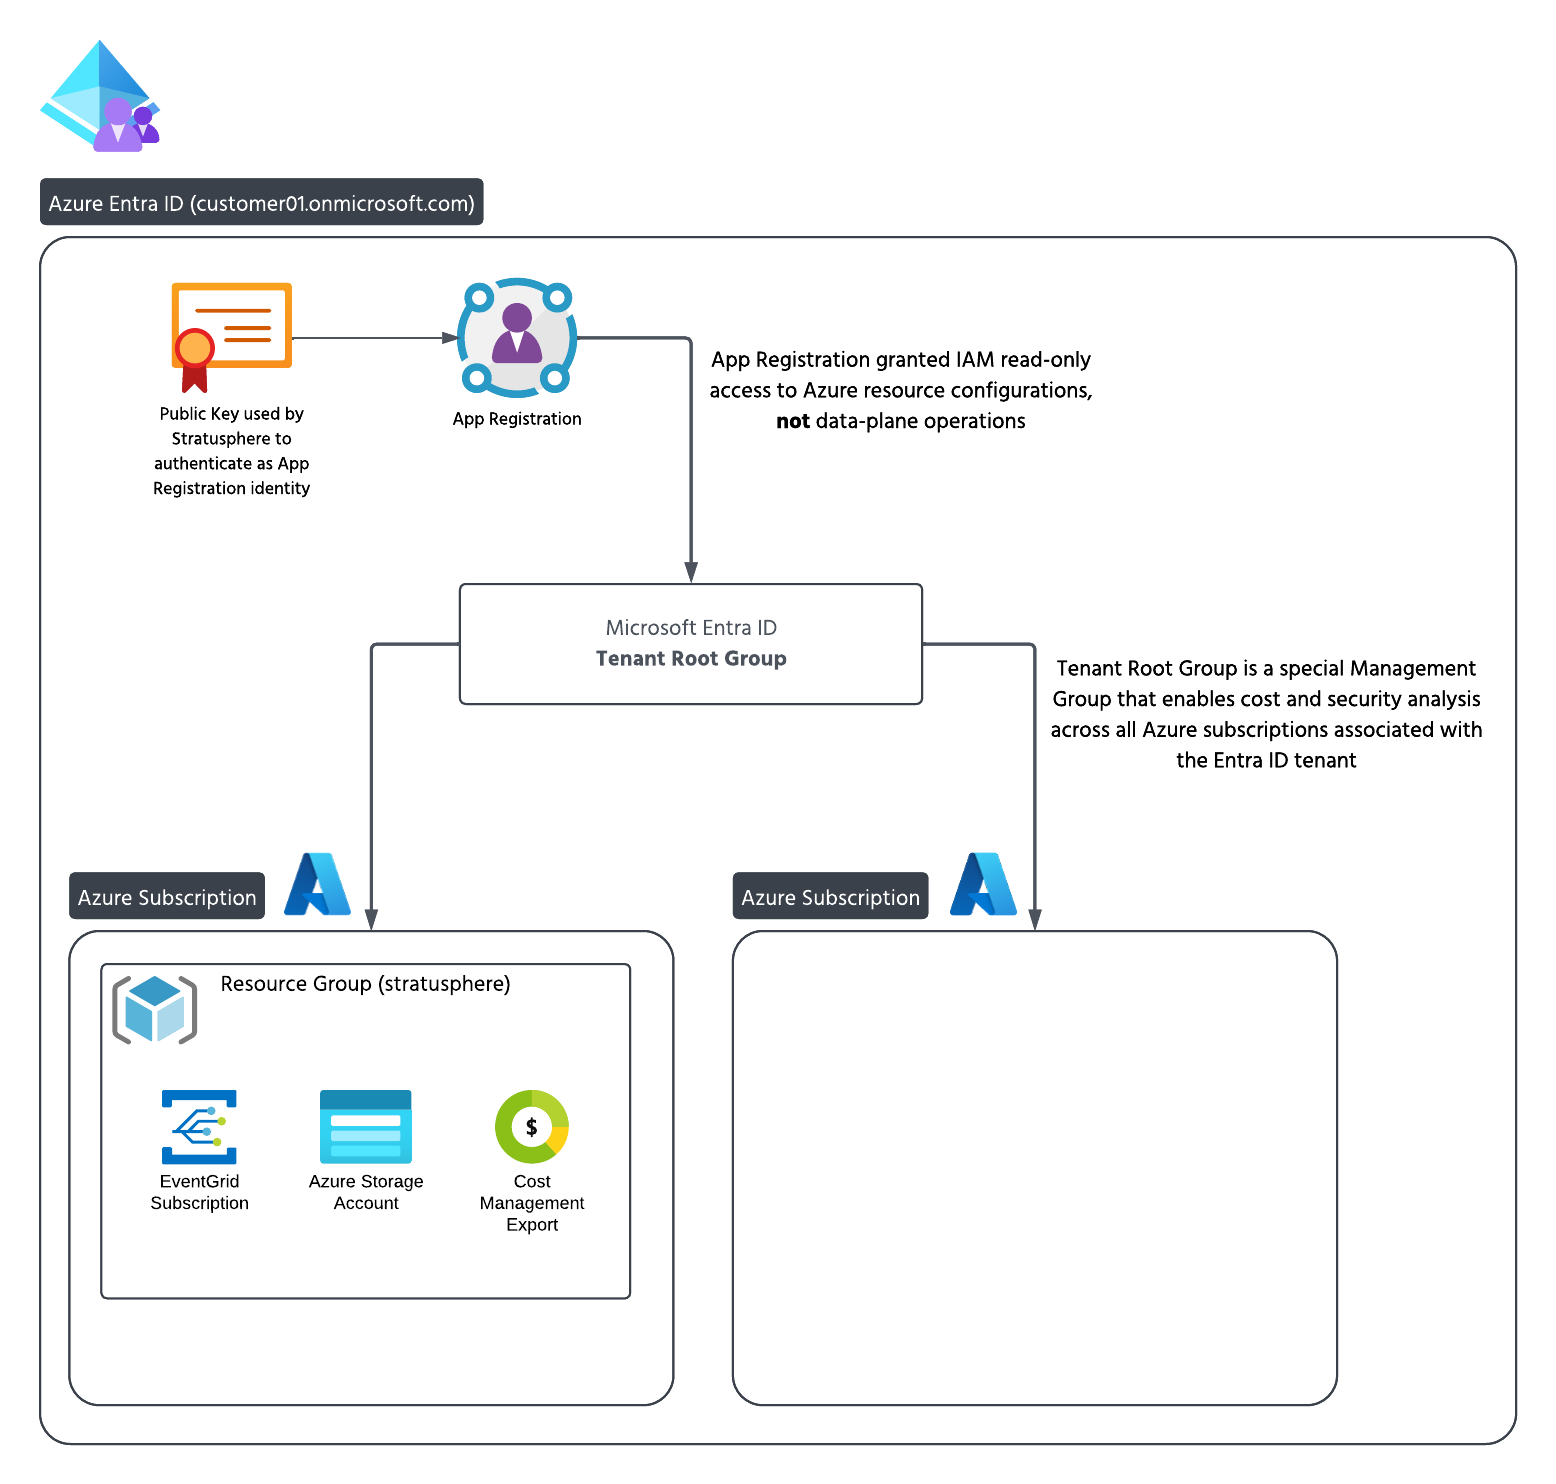
Both methods create the following in your tenant:
- A Microsoft Entra app registration with the name
stratusgrid-stratusphere, its service principal, and the certificate that Stratusphere made for your tenant.
- Reader and Billing Reader role assignments at your Tenant Root Group. These roles are read-only.
- A resource group (default
rg-stratusphere). It contains a storage account and an Event Grid subscription. The subscription tells Stratusphere when new cost data is available.
- Cost Management exports (actual, amortized, and FOCUS datasets) at your billing scope. Azure delivers the data each day in the Parquet/Snappy format.
- A backfill export run for this month and the month before.
Stratusphere gets read-only access. StratusGrid can't change or manage anything in your tenant.
Review the script and template
The Quickstart command downloads the script for you, so you don't need to download anything. If you want to review the files before you run them, here they are:
These files are the same for every customer. Your API token and certificate link are passed in when you run them, so you don't need to edit either file.
Prerequisites
Before you start, make sure you have:
- The Owner or Admin role in Stratusphere. Other roles cannot add a data source.
- Your Azure tenant ID. In the Azure portal, go to Microsoft Entra ID → Overview.
- Permission to create an app registration in Microsoft Entra ID (for example, Application Administrator).
- Permission to assign roles at the Tenant Root Group (User Access Administrator or Owner at the root scope). See Turn on access management for Azure resources.
- The Owner or Contributor role on the subscription that will contain the storage account.
- A billing role, so you can create and view cost exports:
- Enterprise Agreement: Enterprise Administrator or Enterprise Read-Only
- Microsoft Customer Agreement: Billing Account Contributor or Billing Profile Contributor
Turn on access management for Azure resources
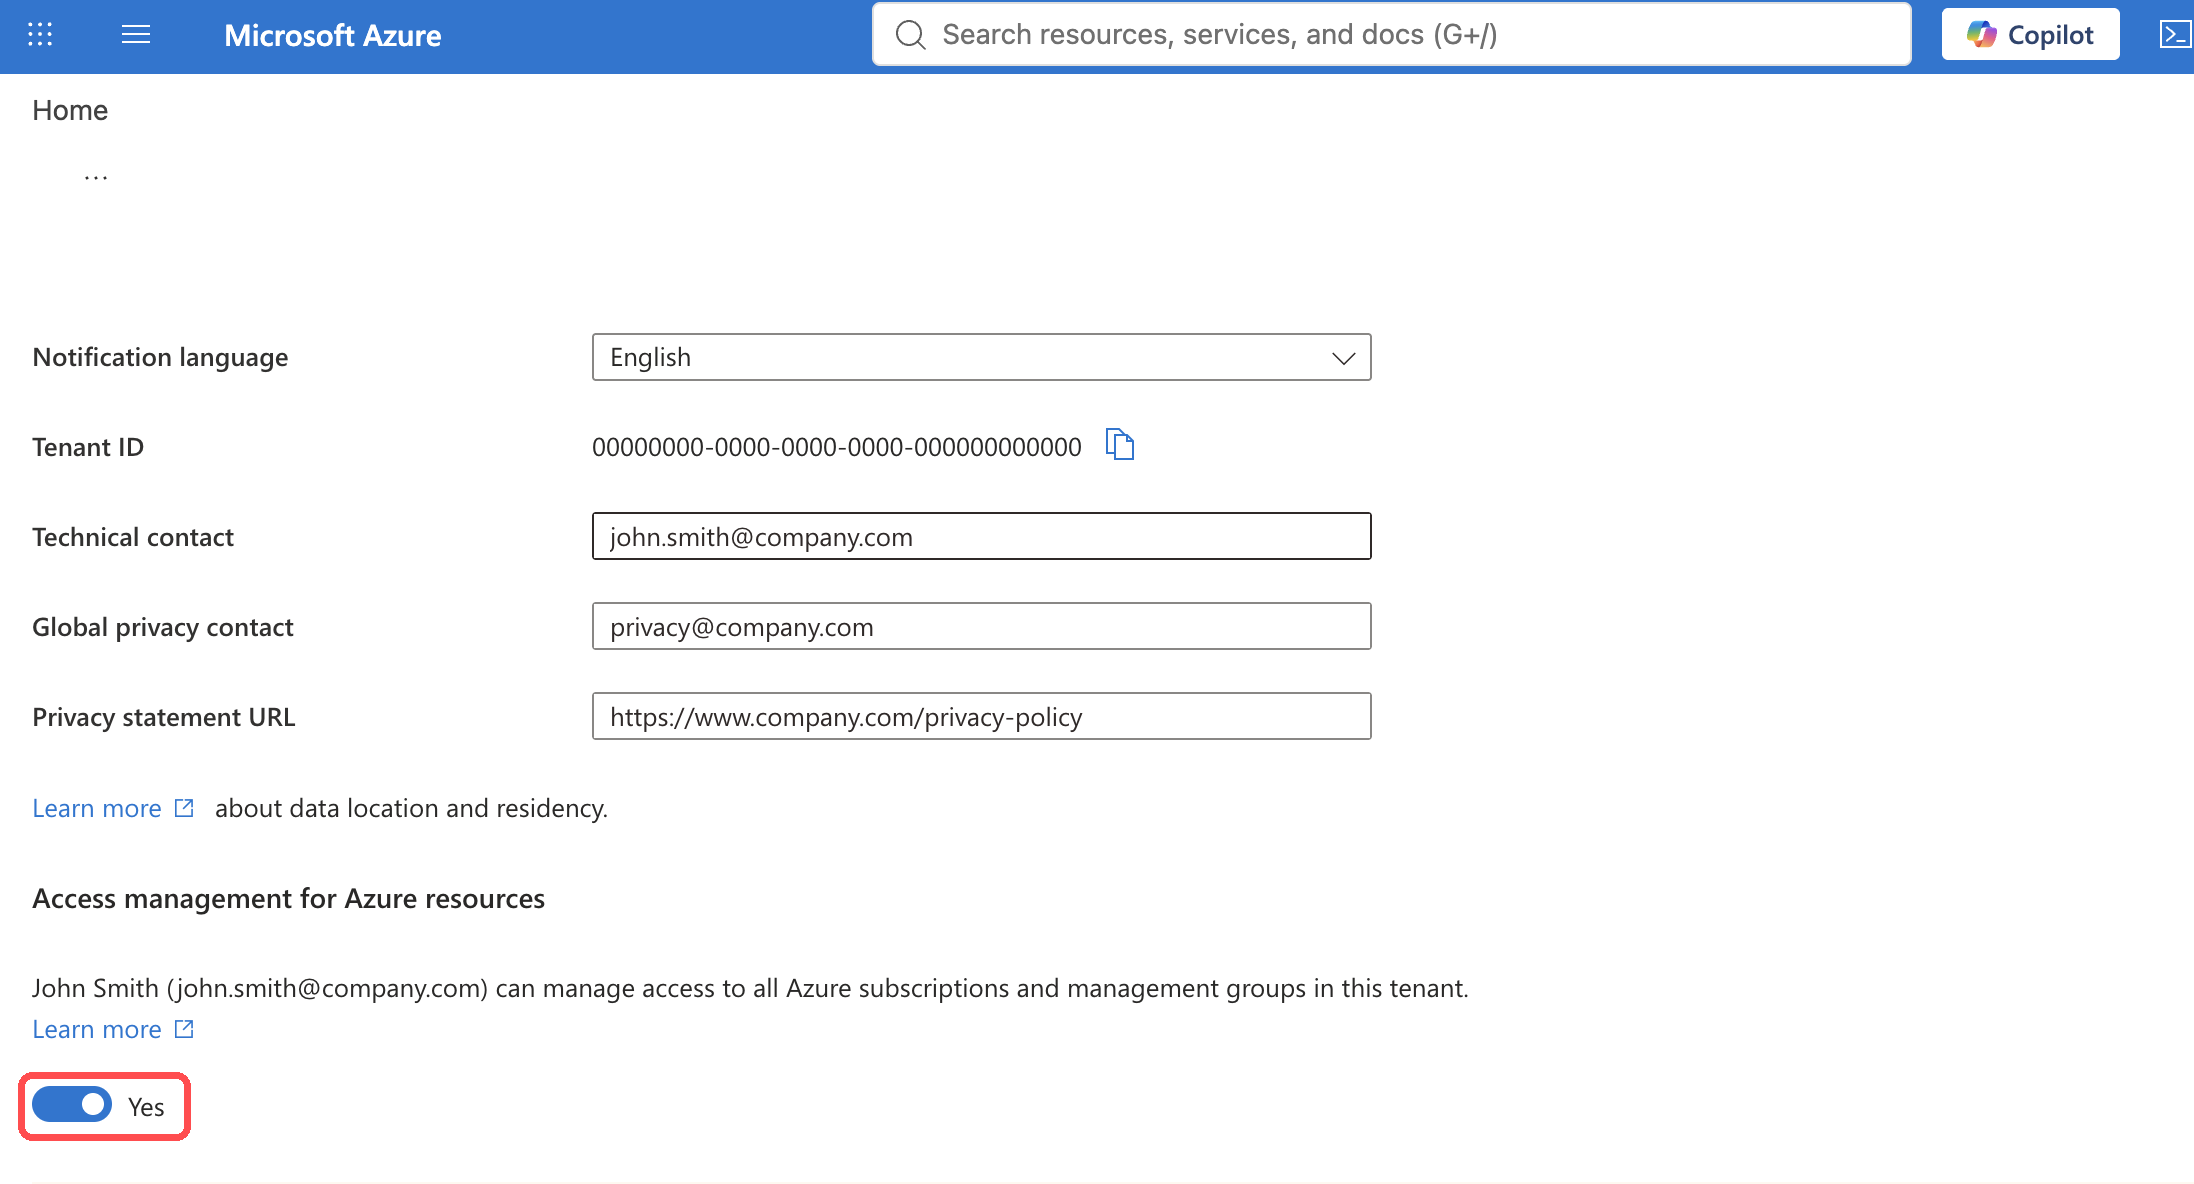
By default, even a Global Administrator can't assign roles at the Tenant Root Group. To turn this on, a Global Administrator must:
- In the Azure portal, go to Microsoft Entra ID → Manage → Properties.
- Under Access management for Azure resources, set the toggle to Yes.
Quickstart setup (recommended)
-
-
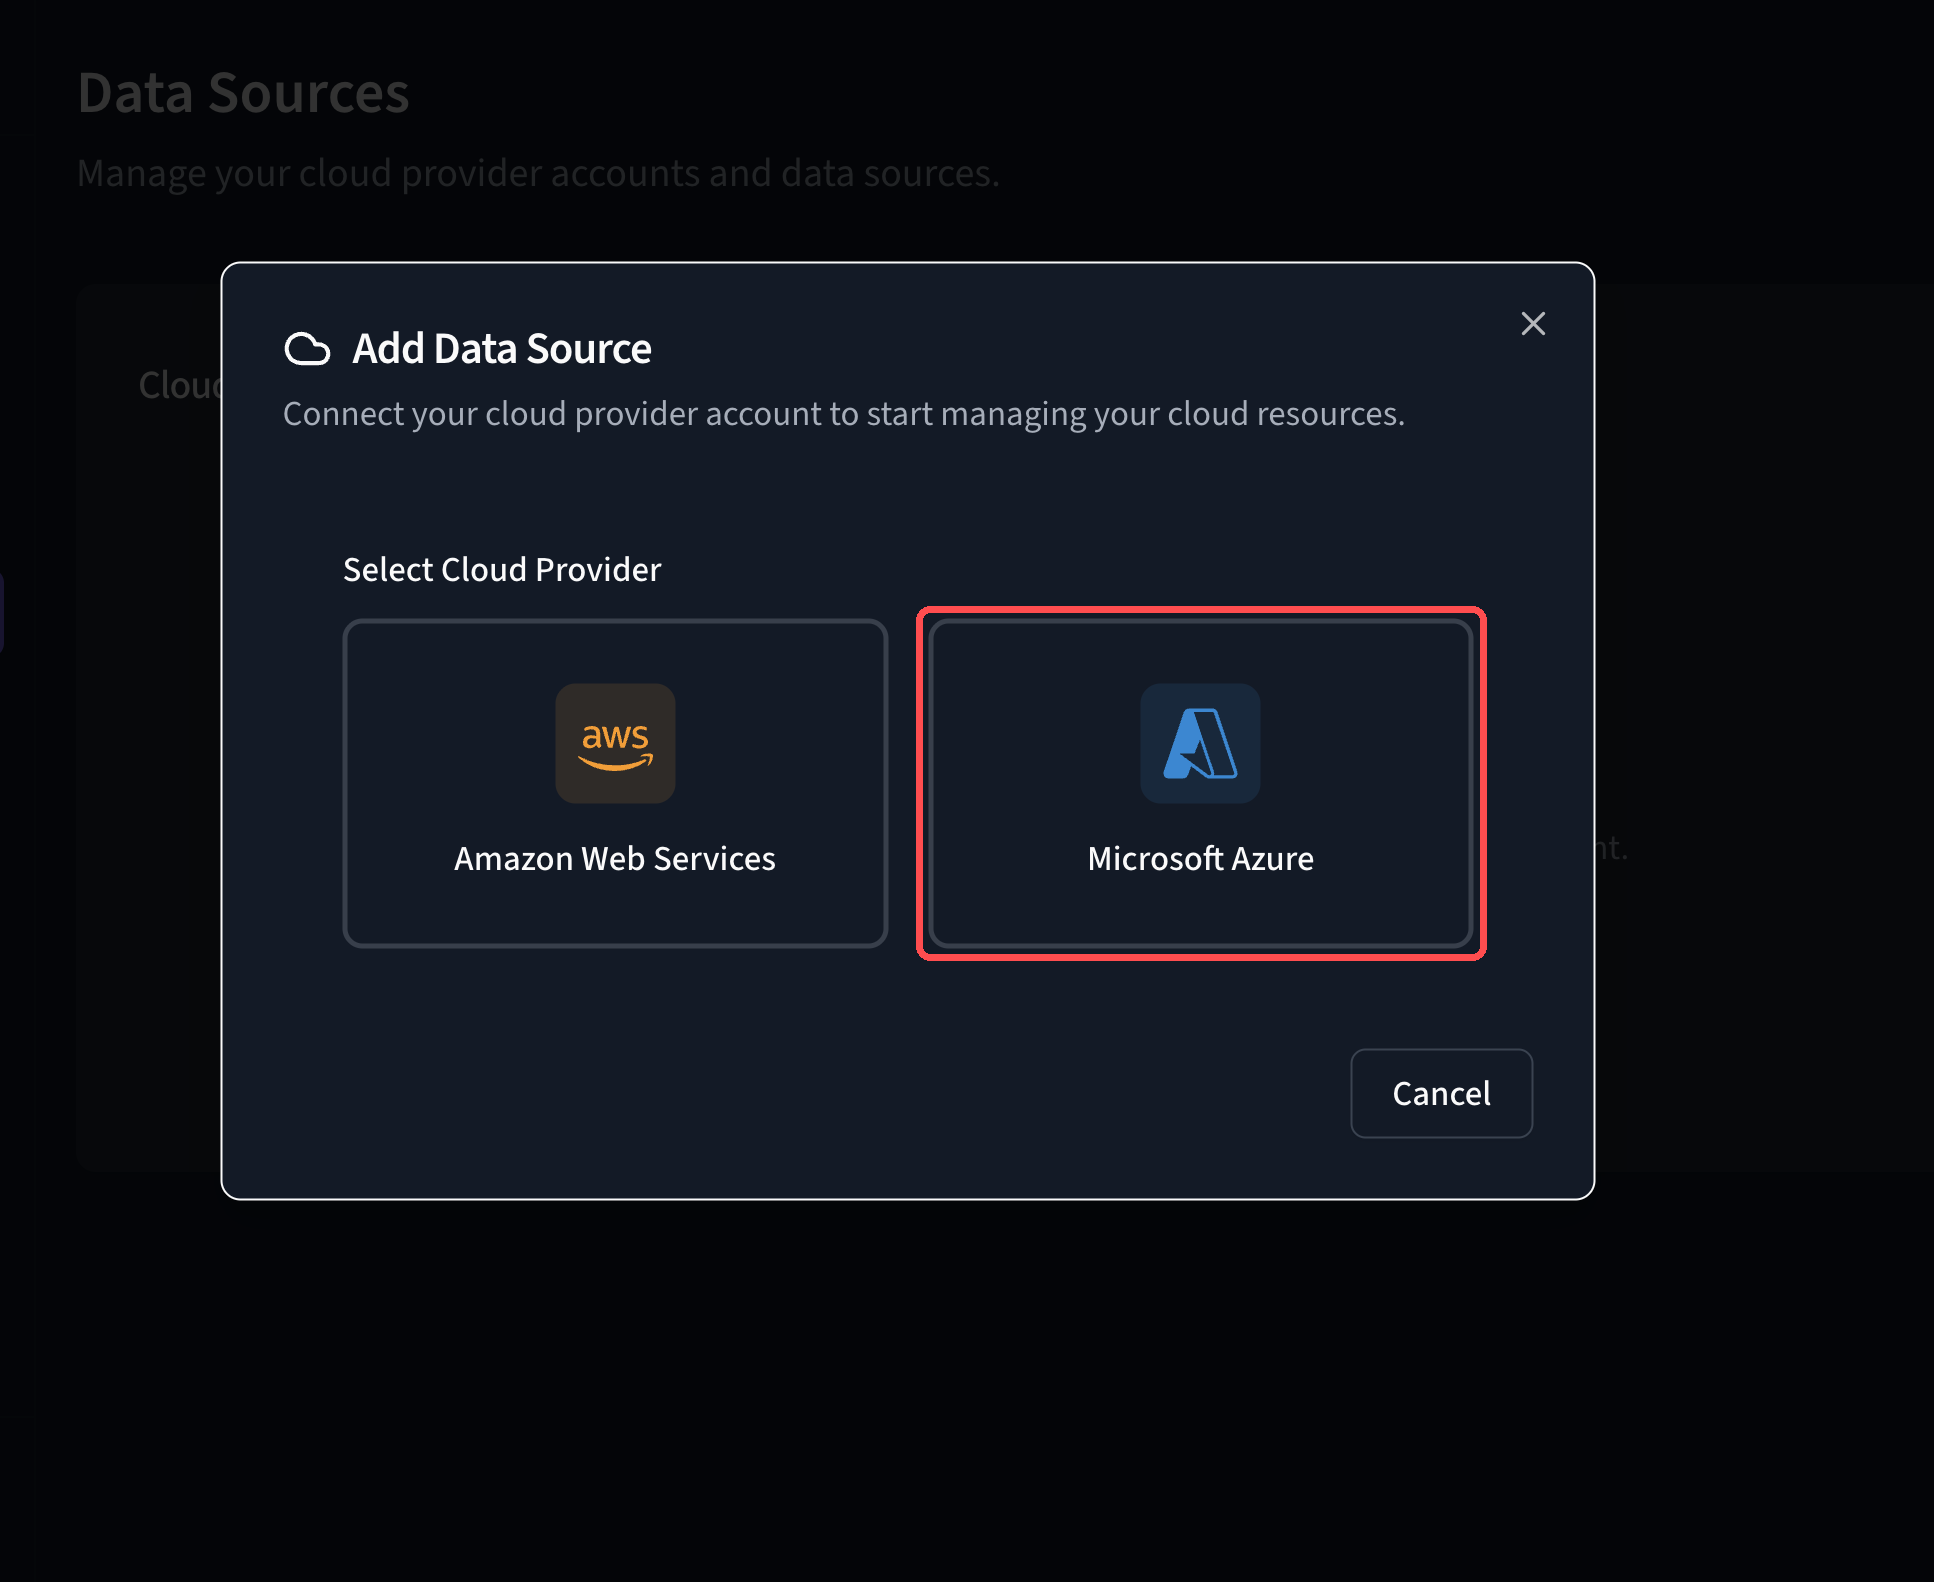
Select Microsoft Azure.
-
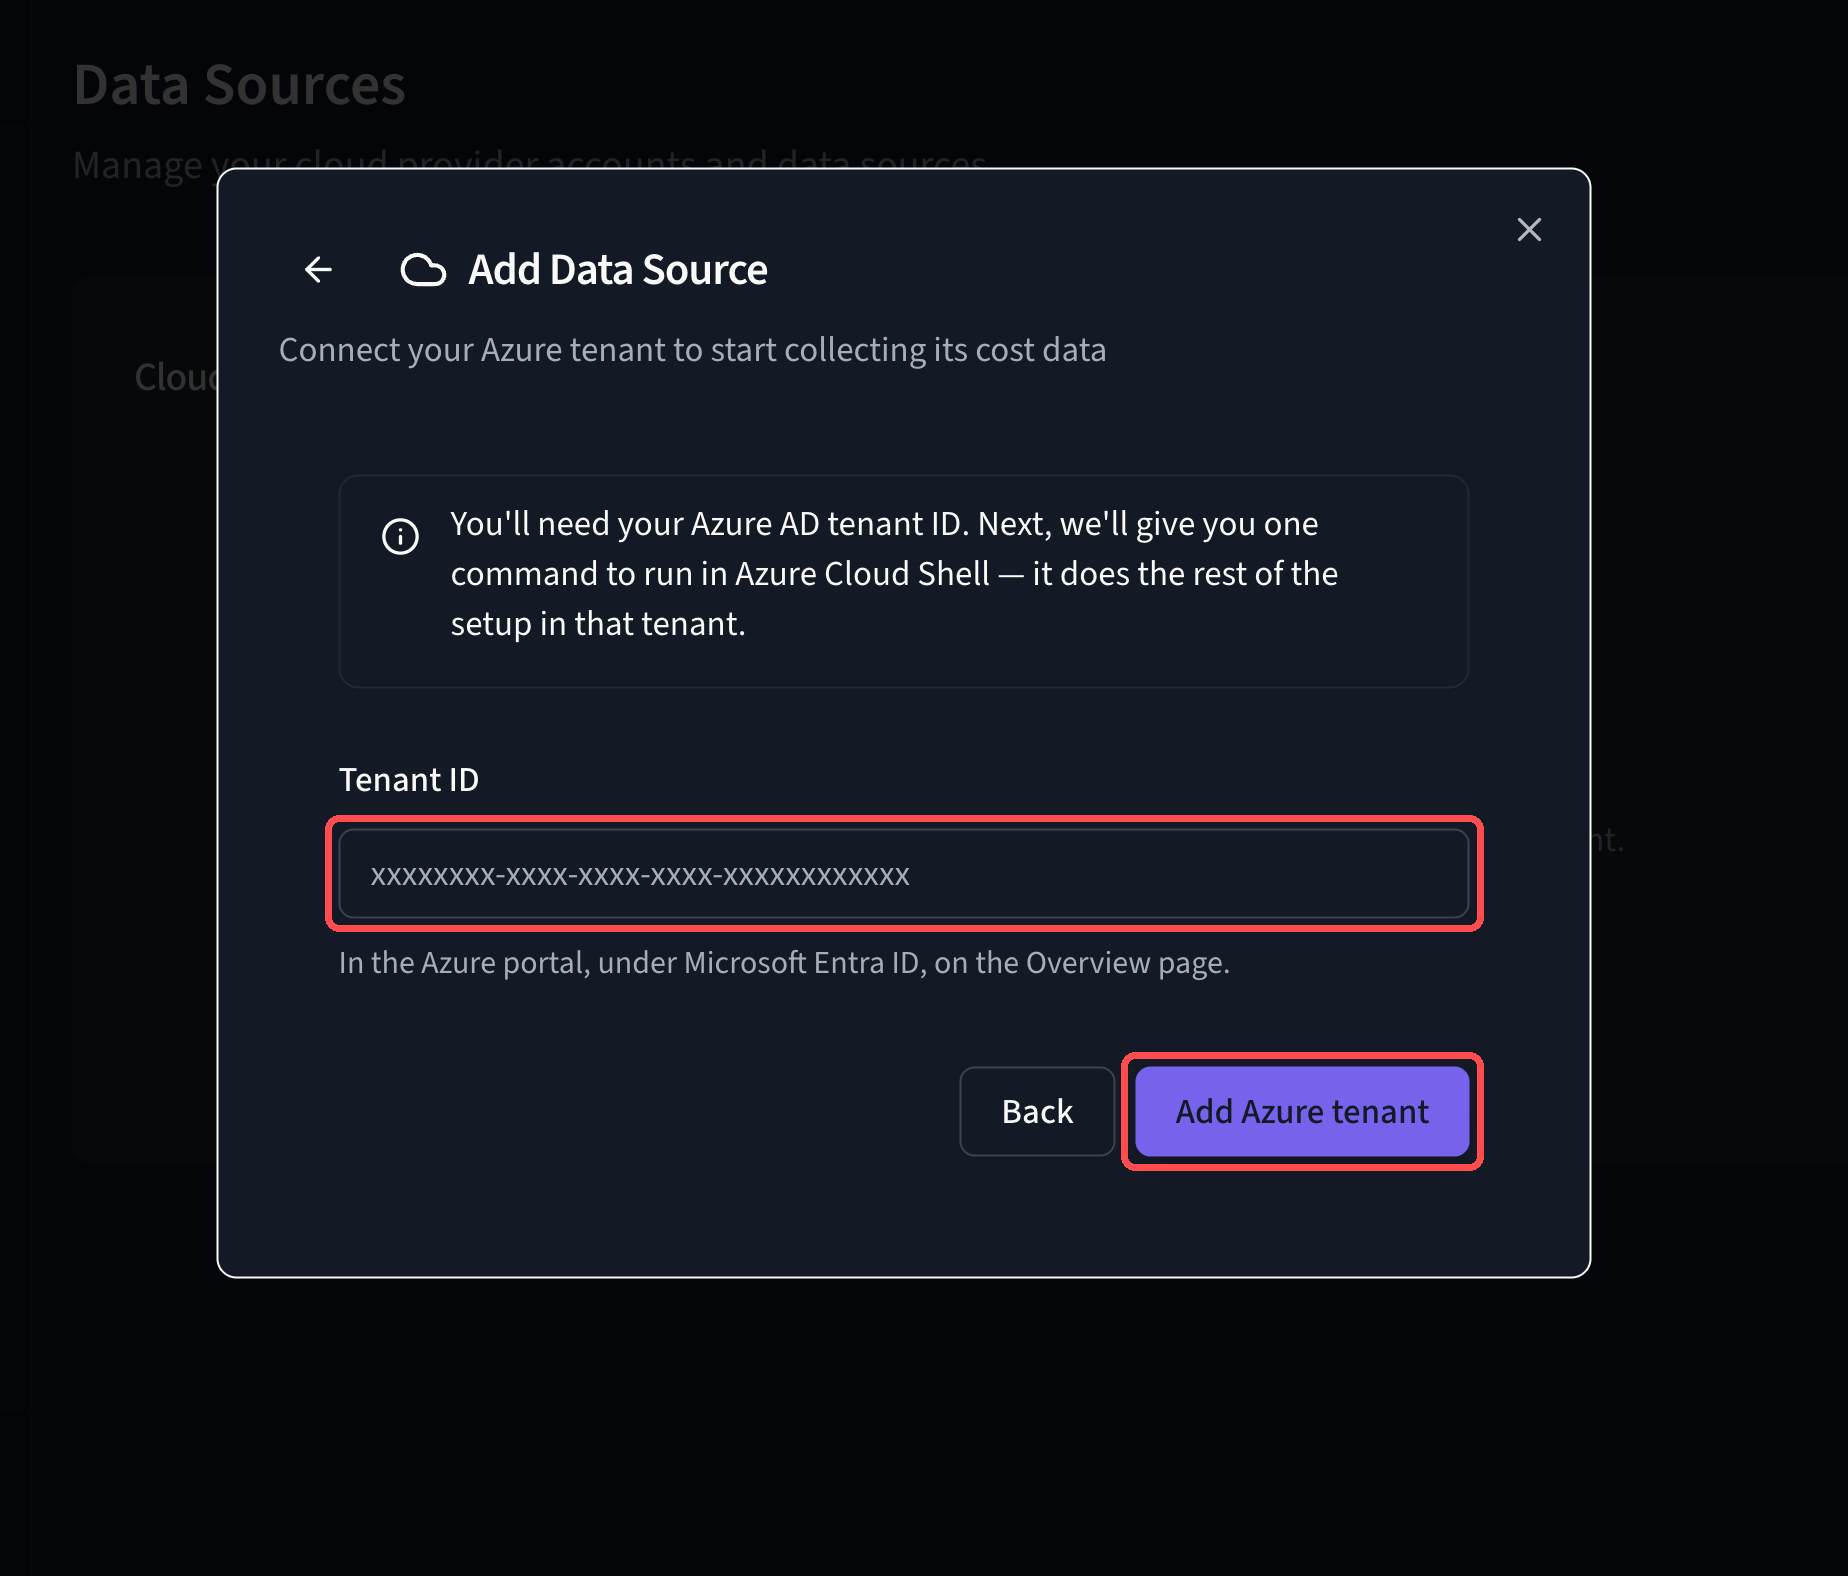
Enter your tenant ID and click Add Azure tenant. Stratusphere shows a command that contains your API token and your certificate link.
-
Open
Azure Cloud Shell in
PowerShell mode. Make sure you're signed in to the tenant you're connecting.
-
Optional: to see the plan without changing anything, first select Preview only. If you type the command yourself, add -DryRun.
Click Copy command. Paste the command into Cloud Shell and run it. The command is similar to this:
irm https://stratusphere.app/Connect-Stratusphere.ps1 -OutFile Connect-Stratusphere.ps1
./Connect-Stratusphere.ps1 `
  -ApiToken <your-api-token> `
  -PublicKeyUrl <your-certificate-link>
The script shows each role, resource, and cost export that it will create. Review the plan, and then type y to confirm.
-
When the script completes, it shows a Client ID. Copy this value. In Stratusphere, paste it in the client ID field and click Connect and verify.
It's safe to run the script again. It reuses anything it already created instead of making duplicates.
More than one tenant? Add each tenant in Stratusphere, then run its command in that tenant. If your tenants share one billing account, only the first run creates the cost exports. Later runs connect the tenant without creating new exports and show the message "Already set up by another tenant, left untouched". This is expected, and you don't need to do anything.
Finish setup later
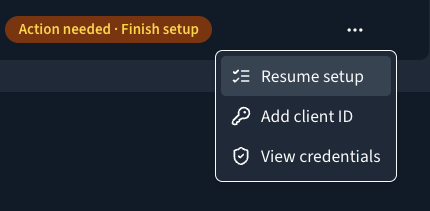
If you close the setup before you enter the client ID, the tenant shows Action needed · Finish setup on the Data Sources page. Click ⋯ on the tenant's row, and then:
- Resume setup: shows the setup steps again. If you have not run the script yet, click Show me the command. This makes a new API token, and the old one stops working.
- Add client ID: use this if you already ran the script and only need to enter the client ID.
Troubleshooting
- The script says the billing account isn't reachable, or that another tenant owns it. This is expected when your billing is managed in a different tenant. The script still connects this tenant, and the cost exports come from the tenant that owns the billing account.
- The script says the tenant is only partly connected, or cost data doesn't appear in Stratusphere. Send us the
stratusphere-diagnostics.json file from the folder where you ran the script. It shows which billing account the script found and which exports it created or left in place. To get the file from Cloud Shell, select Manage files → Download.
- The script stops with "Onboarding stopped". Send us the details under "Send this to StratusGrid if you need help", and the
stratusphere-error.log file from the same folder, if there is one.
- Your Azure costs look about twice as high as expected. You may have two sets of cost exports covering the same usage. Contact us before you delete anything, and we'll help you find the set to remove.
Manual setup (alternative)
Step 1 — Get your API token and certificate link
The manual setup still starts in Stratusphere, which creates your API token and certificate link.
- Do steps 1 to 3 of the Quickstart setup: go to Settings → Data Sources, click Add Data Source, select Microsoft Azure, enter your tenant ID, and click Add Azure tenant.
- Stratusphere shows a command. Do not run it. Running it would set up the Quickstart as well, and your Azure costs could be counted twice.
- From the command, copy the value after
-ApiToken (your API token) and the value after -PublicKeyUrl (your certificate link). Save both somewhere secure. The API token is shown only once.
Step 2 — Create the app registration
- Download the certificate for your tenant (a
.pem file). Use the link that Stratusphere gave you. The link expires after 24 hours. You can also get the certificate from the Data Sources page: click ⋯ on the tenant's row, and then View credentials.
- Go to Microsoft Entra ID → App registrations → New registration. Create an application with the name
stratusgrid-stratusphere. Select single tenant. Do not set a redirect URI.
- On the app, go to Certificates & secrets → Certificates → Upload certificate. Upload the
.pem file.
- Check that the app has a service principal. It appears under Enterprise applications. If it doesn't, run
az ad sp create --id <app-client-id>.
- Note the Application (client) ID and the Object ID of the service principal. You'll need both in later steps.
Step 3 — Give read-only access at the Tenant Root Group
Assign these two roles to the service principal at the Tenant Root Group (management group scope):
In the portal, go to Management groups → Tenant Root Group → Access control (IAM) → Add role assignment.
Step 4 — Deploy the ARM template
The template deploys at the subscription scope. It creates the resource group, the storage account, the Event Grid subscription, and the Cost Management exports.
First, find your billing scope. This is where the cost exports are created. In the Azure portal, go to Cost Management + Billing → Billing scopes, select your billing account, and copy its ID from Properties. You can also run:
az billing account list --query "[].{id:id, name:displayName, type:agreementType}" -o table
Billing scopes normally have this format: /providers/Microsoft.Billing/billingAccounts/<billing-account-id>. If you're using pay-as-you-go, use this instead: /subscriptions/<subscription-id>.
Then deploy the template:
az deployment sub create `
  --location eastus `
  --template-uri https://stratusphere.app/stratusphere-azure.json `
  --parameters `
    servicePrincipalId=<service-principal-client-id> `
    stratusphereAPIToken=<your-api-token> `
    billingScope=<your-billing-scope>
If the deployment reports an unregistered resource provider, register Microsoft.EventGrid, Microsoft.Storage, and Microsoft.CostManagement on the subscription (Subscriptions → Resource providers), and then deploy again.
Template parameters (the first three are required):
| Parameter |
Default |
Notes |
servicePrincipalId |
— (required) |
The Client ID of the service principal from Step 2 |
stratusphereAPIToken |
— (required) |
The API token from Stratusphere |
billingScope |
— (required) |
The billing scope that you found above |
resourceGroupName |
rg-stratusphere |
The resource group that the template creates |
location |
eastus |
The region for the ingestion resources |
storageSubscriptionId |
the current subscription |
The subscription that contains the storage account |
deployFocusExport |
true |
Set this to false only if your agreement type does not support FOCUS |
Step 5 — Give the exports access to the storage account
The template in Step 4 makes a managed identity for each Cost Management export. The export uses this identity to write data to the storage account.
Each identity must have the Storage Blob Data Contributor role on the storage account. If an identity does not have this role, its export cannot send data.
The Exports page does not show the identities. Use Microsoft Entra ID to find them.
Find the export identities
- Go to Microsoft Entra ID → Enterprise applications.
- Remove the filter Application type == Enterprise Applications.
- Set Application type to Managed Identities.
- In the search box, type
stratusphere.
- Make sure that the list shows one identity for each export:
stratusphere-actualstratusphere-amortizedstratusphere-focus
NOTE: The stratusphere-focus identity shows only if you set deployFocusExport to true in Step 4.
Give the role to the identities
CAUTION: DO NOT SELECT MANAGED IDENTITY IN THE ASSIGN ACCESS TO FIELD. THAT LIST DOES NOT SHOW COST MANAGEMENT EXPORTS.
- Go to Resource groups → rg-stratusphere.
- Select the storage account.
- Go to Access control (IAM) → Add → Add role assignment.
- On the Role tab, select Storage Blob Data Contributor.
- Click Next.
- On the Members tab, set Assign access to to User, group, or service principal.
- Click Select members.
- Type the name of an export identity in the search box.
- Select the identity.
- Do steps 8 and 9 again for each export identity.
- Click Review + assign.
Make sure that the role is correct
- On the storage account, go to Access control (IAM) → Role assignments.
- Make sure that each export identity shows under Storage Blob Data Contributor.
NOTE: Azure can take some minutes to apply a new role. Wait 5 minutes before you start Step 6.
Step 6 — Run the exports for this month and last month
Stratusphere needs data for both the current month and the previous month to process your costs correctly. For each export:
- In the portal, go to Cost Management → Exports and select the export.
- Click Run now. This exports the current month to date. As an alternative, run
az costmanagement export execute.
- Click Export selected dates. Choose the first and last day of last month, and then click Execute.
Step 7 — Complete the setup in Stratusphere
On the Data Sources page, click ⋯ on the tenant's row, and then Add client ID. Paste the Application (client) ID from Step 2 and click Connect and verify. Stratusphere checks the credentials and confirms when the tenant is connected.
Have questions or need additional help? Contact StratusGrid support.