When you're building applications that run outside AWS, but still need access to AWS services, you need AWS credentials. In years past, you could generate static, long-lived credentials by using an IAM User. However, long-lived credentials are a malicious attacker's best friend. In 2022, AWS released a new IAM feature called IAM Roles Anywhere.
The idea behind this service is that you can establish a trust relationship between an application, running outside of AWS, and an IAM Role with limited permissions to AWS services.
IAM Roles use short-lived credentials that automatically rotate. These short-lived credentials can be retrieved by authenticating your application with a secure X.509 client certificate instead. In this blog, we'll explore how to configure the AWS IAM Roles Anywhere service, so that you can securely run business applications, that need to call AWS APIs, in your data centers, or on alternative cloud platforms.
Revolutionizing AWS Access: The Power of IAM Roles Anywhere
For many years, AWS has provided the ability to authenticate to other services using an AWS Identity & Access Management (IAM) role that’s associated with an EC2 instance. This feature is known as an EC2 “instance profile.” This allows application code running on the virtual machine to automatically obtain rotating AWS credentials, using the private EC2 metadata endpoint.
Similarly, AWS Lambda supports an “execution role,” which is the identity associated with each function. Container-based “Tasks” launched under Amazon Elastic Container Service (ECS) support the notion of a “task role,” which again, is the IAM role bound to the ECS Task.
This tight integration between AWS IAM, and each supported compute service, avoids the need to generate static credentials and embed them on the infrastructure or application. Long-term credentials, without an expiration timestamp, create a major security risk.
When you deploy infrastructure and applications outside of AWS, such as on self-hosted hardware or alternate cloud vendors, you lose this tight integration between IAM and compute services.
Mastering Certificate Management with Step CLI
The traditional tool used to work with certificates is OpenSSL. However, OpenSSL has many different parameters and can be challenging to learn. A company called Smallstep has developed a cross-platform, Apache-licensed tool called Step CLI, that can be used to generate Certificate Authority (CA) certificates and client certificates. The syntax is easier to understand than OpenSSL, which makes it a great tool for general certificate operations.
You’ll need to download the compatible binary for your operating system. You can use some package managers, such as Homebrew on MacOS, to install the Step CLI. If you’d rather download it directly, head to the GitHub project page for Step CLI, then navigate to Releases, and then click the link for the desired platform. You can extract the archive and find the binary inside.
There are other instructions for installation with a package manager, in the project’s README.
Building a Foundation of Trust: Configuring Your Trust Anchor
In the IAM Roles Anywhere service, the Trust Anchor is the Certificate Authority (CA) certificate that’s used to validate client certificates. Client certificates must be signed with the Trust Anchor’s private key, to be validated.
First, we need to generate a CA certificate with the Step CLI tool.
step certificate create --profile root-ca "StratusGrid Testing" stratusgrid-test.crt stratusgrid-test.key
When prompted, specify a secure password for your root CA private key. This command will produce two new files: the root CA public key and private key. The value inside the double quotes is the subject name of the certificate.
Now you can import the root CA’s public key into the IAM Roles Anywhere service as a Trust Anchor.
- Open the AWS Management Console
- Navigate to the AWS IAM Service
- Select the Roles area
- Scroll to Roles Anywhere and click Manage (Figure 1)
- Click the Create a Trust Anchor button (Figure 2)
- Specify a name for the Trust Anchor
- Select the External certificate bundle option (Figure 3)
- Copy-paste the CA public key file contents into the text box
- Click the Create a Trust Anchor button
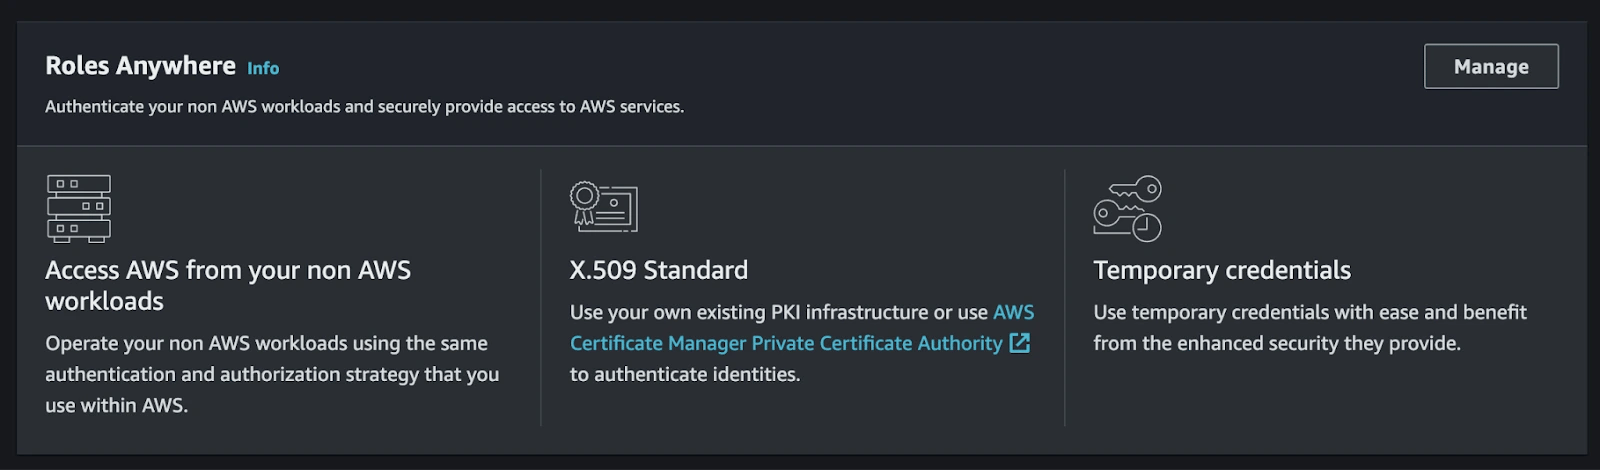
Figure 1 | IAM Roles Screen
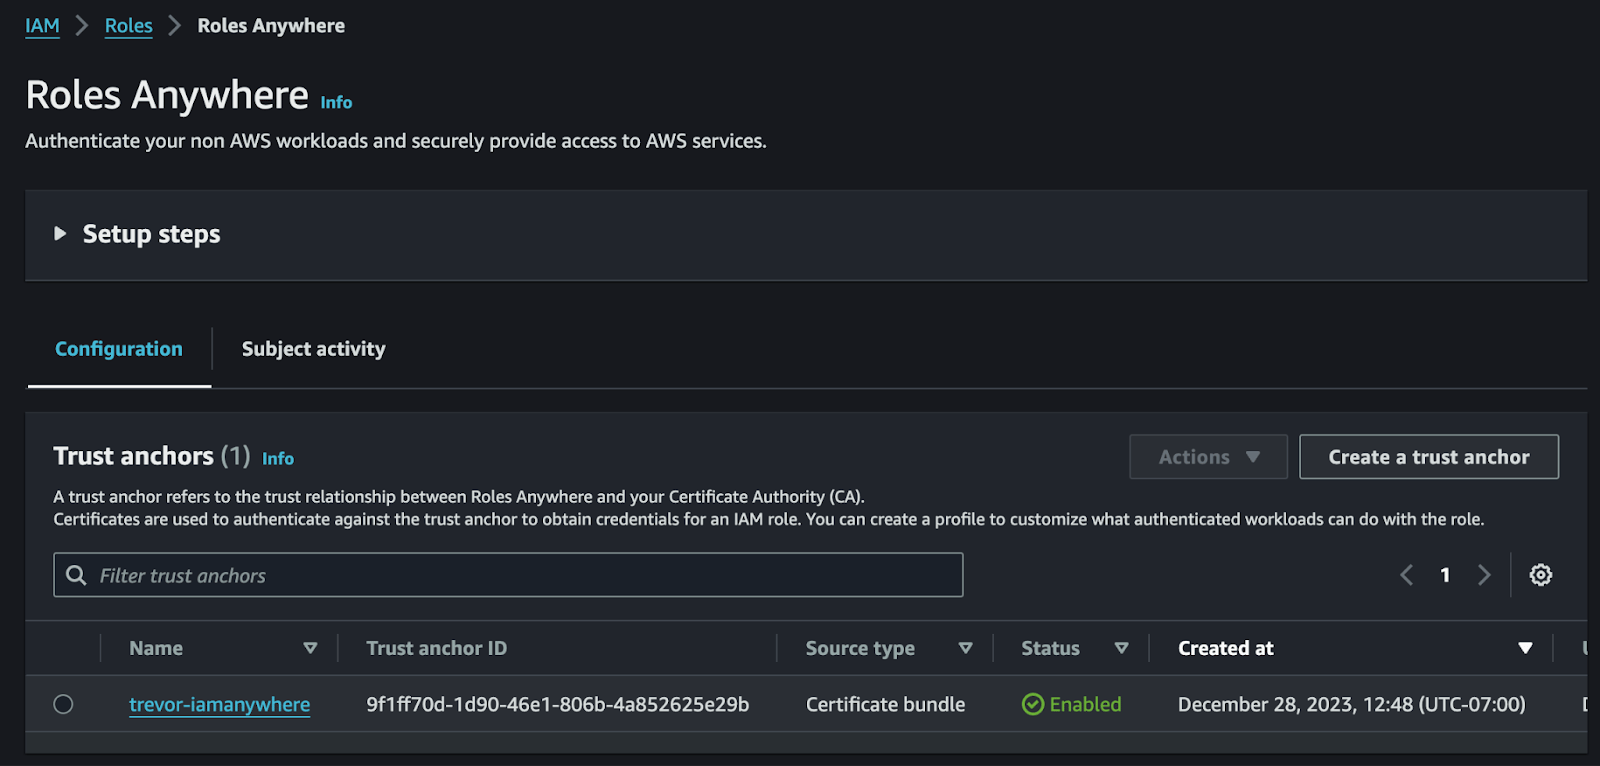
Figure 2 | Roles Anywhere Screen

Figure 3 | Create Trust Anchor
Generate Client (Leaf) Certificate
Now that you’ve imported the Trust Anchor, you can generate a new client certificate that’s signed by the root CA key. Client certificates are also called “leaf” certificates in Step CLI. The Step CLI command is pretty similar, except that you’ll need to specify the root CA public and private key certificate paths.
The client certificate is what will get placed onto each virtual machine or application separately. This certificate uniquely identifies the VM or application that’s requesting AWS credentials from the IAM service. The API that’s called, to exchange the certificate for a temporary set of AWS credentials is called the CreateSession API.
For now, you can use the certificate on your local development workstation, or perhaps a Linux virtual machine deployed in a non-AWS cloud platform, or on other local hardware.
Here’s the command to generate a client certificate:
step certificate create --profile leaf stratusgrid-client stratusgrid-client.crt stratusgrid-client.key --ca stratusgrid-test.crt --ca-key stratusgrid-test.key --no-password --insecure
Notice that we changed the profile parameter to the “leaf” profile. We still need to specify a subject, and path to the newly created public and private key files. Finally, we specify the public and private keys of the CA certificate that we previously generated.
NOTE: The client certificate’s private key must have no password. This is necessary when we attempt to consume the private key later on. If you’ve already encrypted your client certificate’s private key with a password, you can decrypt it (remove the password) with the following command:
step crypto change-pass stratusgrid-client.key
Alright, we’re done with generating the CA and client certificates, so let’s move on to the rest of the AWS configuration!
Designing a Secure IAM Role and Policy for External Integration
As part of the IAM Roles Anywhere configuration, you will need to create an IAM Role, and associate the desired policy permissions with it. This IAM Role will be used as the application identity that the generated session credentials will bind to. Any permissions assigned to this IAM Role will be granted to the non-AWS infrastructure or application that requests AWS credentials through IAM Roles Anywhere.
For IAM Roles Anywhere to function correctly, the IAM Role that you create must have a special Trust Relationship (aka. Assume Role Policy Document) that allows the IAM Roles Anywhere service to utilize it.
- Navigate to the AWS IAM console
- Select the Roles option
- Click Create Role button
- Select the Custom Trust Policy option (Figure 4)
- Add the below policy snippet under the Statement array
- Replace the TRUST_ANCHOR_ARN_HERE text with your Trust Anchor ARN
- Next Page: Select a Policy with the permissions you’d like the Role to have. For example, use the built-in AmazonS3FullAccess policy
- Next Page: Specify a name for the IAM Role
- Finish IAM Role creation
NOTE: You can retrieve the Trust Anchor Amazon Resource Name (ARN) from the Trust Anchor details page, under IAM Roles Anywhere.
{   "Effect": "Allow",

    "Principal": { "Service": [ "rolesanywhere.amazonaws.com" ] },

    "Action": [ "sts:AssumeRole",

                "sts:TagSession",

                "sts:SetSourceIdentity" ],

    "Condition": {

      "ArnEquals": {

        "aws:SourceArn": [

          "TRUST_ANCHOR_ARN_HERE"

] } } }
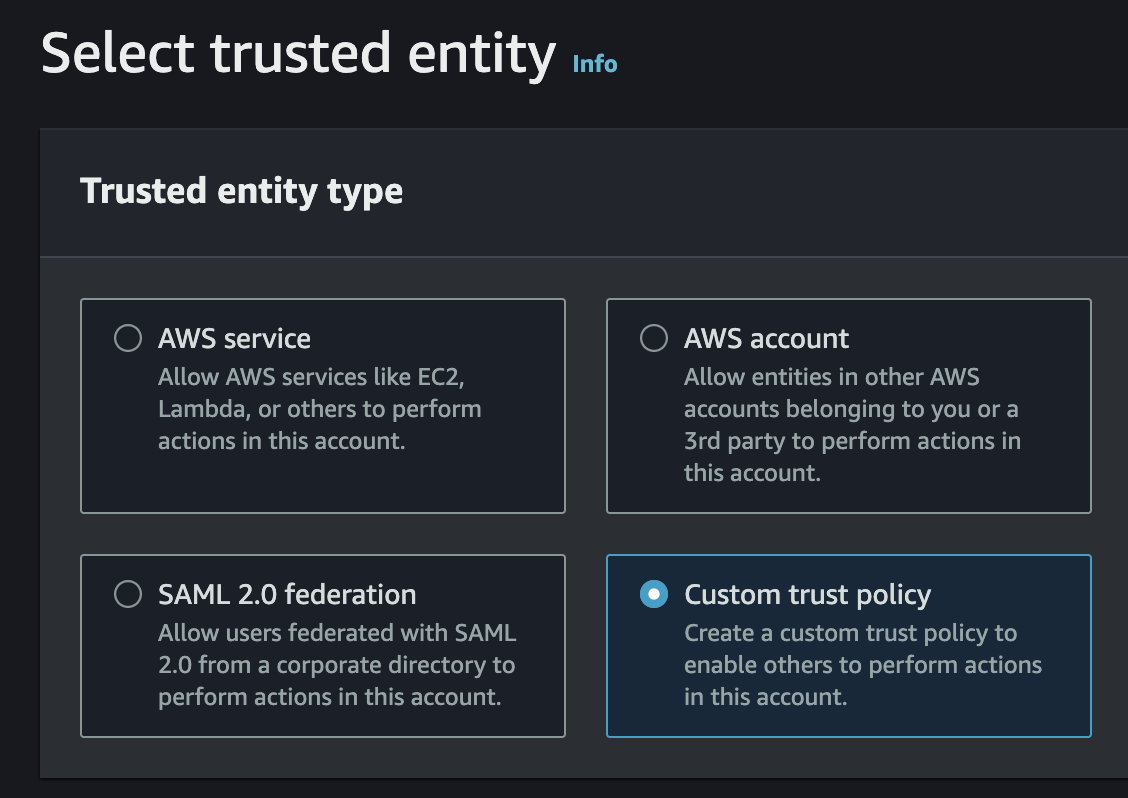
Figure 4 | IAM Role Trusted Entity Type
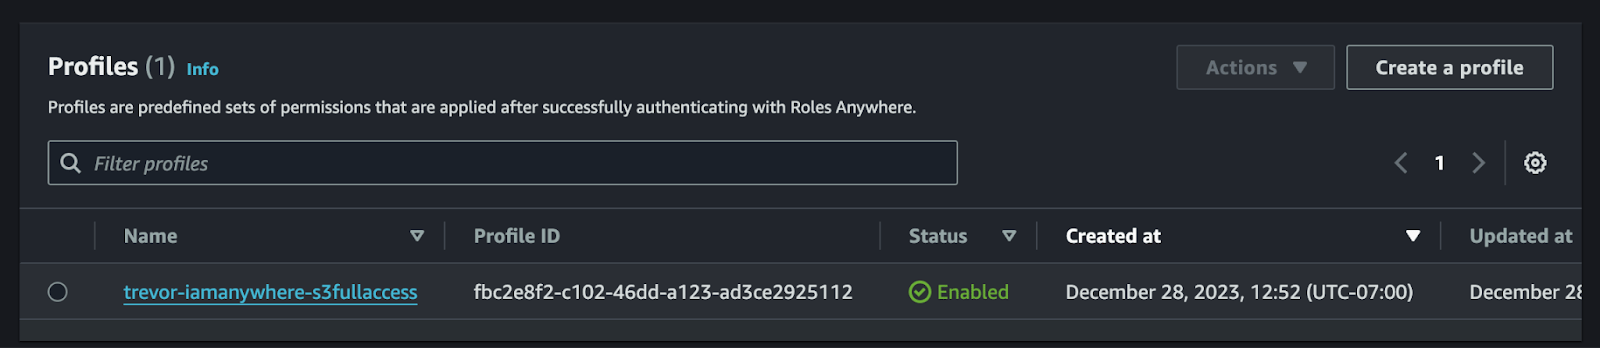
Create IAM Roles Anywhere Profile
Now that you’ve created the IAM Role with permissions, it’s time to make the IAM Roles Anywhere service “aware” of that Role. We will accomplish that with the “Profile” resource.
The IAM Roles Anywhere Profile resource essentially just enables a particular IAM Role to be utilized through the CreateSession API. One additional function, which is entirely optional, is to create a policy on the Profile resource, which limits the permissions of the IAM Role that is bound to the Profile. If you’re familiar with Service Control Policies (SCP) from the AWS Organizations service, then Profile policies in IAM Roles Anywhere work similarly. They do not grant permissions, they limit them.
Here’s the procedure to create the Profile.
- Open the IAM Roles Anywhere screen
- Click the Create a Profile button
- Specify a name for the Profile, such as stratusgrid-s3access
- Select the IAM Role from the drop-down
- Click the Create a Profile button
NOTE: If the Trust Relationship is not configured correctly, on the IAM Role, then the Role will not appear in the drop-down list when creating a Profile.
Request AWS Credentials with CreateSession API
At this point, the AWS configuration should be complete, and it’s time to request credentials. AWS provides documentation, in the IAM Roles Anywhere service docs, that describe how to construct an HTTP call to CreateSession. However, AWS also provides a pre-compiled binary, also known as the “credential helper,” that you can download and call the API with. The utility is available for Linux, MacOS, and Windows.
First of all, download the binary file for your operating system. On Linux and MacOS, you will need to make the binary executable.
chmod +x $HOME/Downloads/aws_signing_helper
NOTE: On MacOS, you may also receive a security warning about this program, when you attempt to run it. In that case, you will need to open the Privacy & Security settings page and click the button to allow the program to execute.
Once you’ve made the binary executable, you can run the program with the --help parameter, to ensure it’s executing properly. As of this writing, if you run the program with no parameters, no text will be emitted.
PowerShell
In PowerShell, to execute a binary, you will need to use the “call” operator, which is either an ampersand or a period, preceding the path to the executable.
& $HOME/Downloads/aws_signing_helper --help
Bash
In Bash, you can just specify the path to the executable to invoke it.
$HOME/Downloads/aws_signing_helper --help
Now that you’ve got the program running, let’s take a look at the command line you’ll run to request credentials from the IAM Roles Anywhere service. Make sure that you have your client certificate (public key) and private key files in your local directory.
You’ll need a few bits of information in addition to your client certificate files.
- Trust Anchor ARN
- Profile ARN
- IAM Role ARN
The final command is going to be pretty long, because of all the values you need to specify. Hence, it’s a bit cleaner to set a few variables, and pass those into the command, instead.
Bash
export TRUST_ANCHOR="ENTER_YOURS_HERE"

export PROFILE="ENTER_YOURS_HERE"

export ROLE="ENTER_YOURS_HERE"

export PUBLIC_KEY="stratusgrid-client.crt"

export PRIVATE_KEY="stratusgrid-client.key"

$HOME/Downloads/aws_signing_helper credential-process \

  --certificate $PUBLIC_KEY \

  --private-key $PRIVATE_KEY \

  --role-arn $ROLE \

  --profile-arn $PROFILE \

  --trust-anchor-arn $TRUST_ANCHOR
PowerShell
$TRUST_ANCHOR = "ENTER_YOURS_HERE"

$PROFILE = "ENTER_YOURS_HERE"

$ROLE = "ENTER_YOURS_HERE"

$PUBLIC_KEY = "stratusgrid-client.crt"

$PRIVATE_KEY = "stratusgrid-client.key"

& $HOME/Downloads/aws_signing_helper credential-process `

  --certificate $PUBLIC_KEY `

  --private-key $PRIVATE_KEY `

  --role-arn $ROLE `

  --profile-arn $PROFILE `

  --trust-anchor-arn $TRUST_ANCHOR
Once you run this command, you should see a JSON object get printed out to your terminal. This JSON object contains several properties, including AccessKeyId, SecretAccessKey, and SessionToken. You can extract these values and use them from the AWS CLI, AWS SDKs, and other software tools, to access AWS services.
Here’s an example of the simple JSON payload structure you’ll receive:
{

    "Version": 1,

    "AccessKeyId": "ACCESS_KEY",

    "SecretAccessKey": "SECRET_KEY",

    "SessionToken": "TOKEN",

    "Expiration": "2024-01-04T20:47:40Z"

}
Pave Your Path to AWS DevOps Excellence With StratusGrid
After following this guide, you should have successfully configured the AWS IAM Roles Anywhere service, and successfully retrieved short-lived credentials. Once you’ve run through this configuration process, it’s pretty easy to understand all the moving parts.
Here are some documentation resources that we’ve used in this post:
Some additional ideas to expand on this solution include the below:
- Write a wrapper script to parse the JSON blob, and generate an AWS credentials INI file.
- Learn about the credential_process configuration to utilize the aws_signing_helper as the credential source.
- Configure an IAM Roles Anywhere profile with multiple IAM Roles, and select the appropriate one when invoking the aws_signing_helper.
Do you need help implementing AWS IAM Anywhere, or other AWS services? Contact StratusGrid today, and let's unlock the full potential of your AWS DevOps services together. Contact us now to start your journey towards a more secure, efficient, and innovative AWS cloud experience.
BONUS: Find Out if Your Organization is Ready for The Cloud ⤵️